
First things first. This is unsupported by Microsoft, VMware, Amazon, Google, AOL, Geocities, John Madden, Edgar Allen Poe and your mother. Also, not generally a good idea.
Please sign here x_______________________________
Storage providers (NAS, SAN, HCI, Cloud, etc.) typically have preferred block sizes for the volumes created on top of their file system. Alignment is also super critical within a VM and you can read a great post about alignment on Duncan Epping’s blog here. Applications also have some best practices around formatted volume cluster sizes (or allocation units, or block size) based on their default average IO size. For instance, for Microsoft MS SQL, Microsoft highly recommends using a block size (allocation unit, cluster size – will be used interchangeably here) of 64k on any volume containing a database. More detailed info here.
Most often, when deploying an application, you will install the binaries on the root drive (C:\) and place the data on a secondary disk. Most applications allow this, some do not. For those instances where the do not and the application has been installed on the boot drive (C:\), you’re stuck with the cluster size you chose on installation (default of 4k).
If the application cannot deal with it’s data on a different device/directory than its binaries, and the binaries cannot be moved, you’re typically stuck unless you want to re-install and migrate data.
If you want to live on the edge, you might be able to convert the boot drive’s block size using VMware’s free vSphere Converter.
This is a step-by-step for that process.
The setup:
Windows 2008 R2 SP1 – fully patched. (also tested/validated on Windows Server 2012 R2)
Single 40GB Boot volume with default 4k cluster size
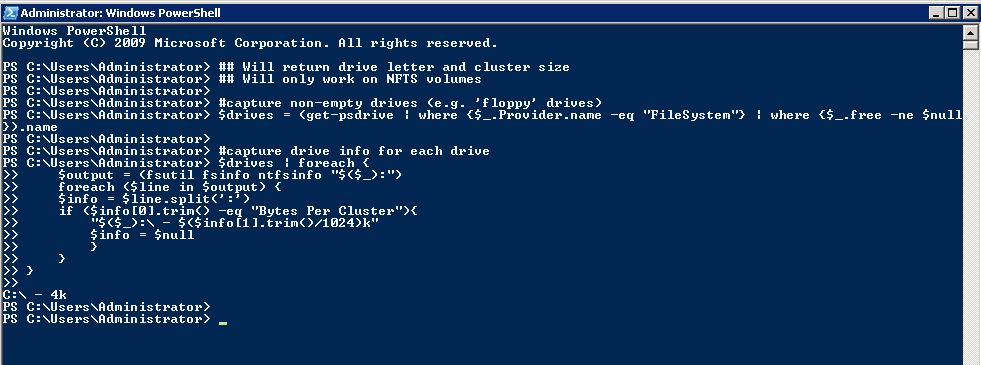
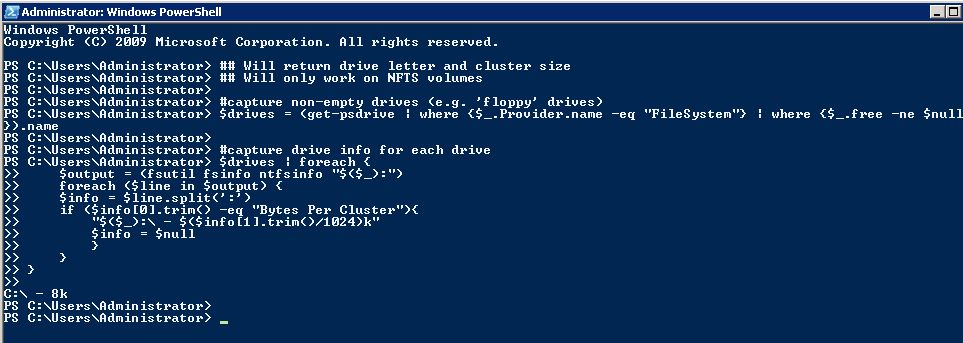
Oh, I wrote a script to be deployed to many VMs and report back the cluster size of all volumes where remote WMI wasn’t possible. This just the data gathering portion of that script.
This is most safely done with a powered off VM with VMware tools installed. This is really about making sure the boot volume of the new VM has no changes to it during the conversion.
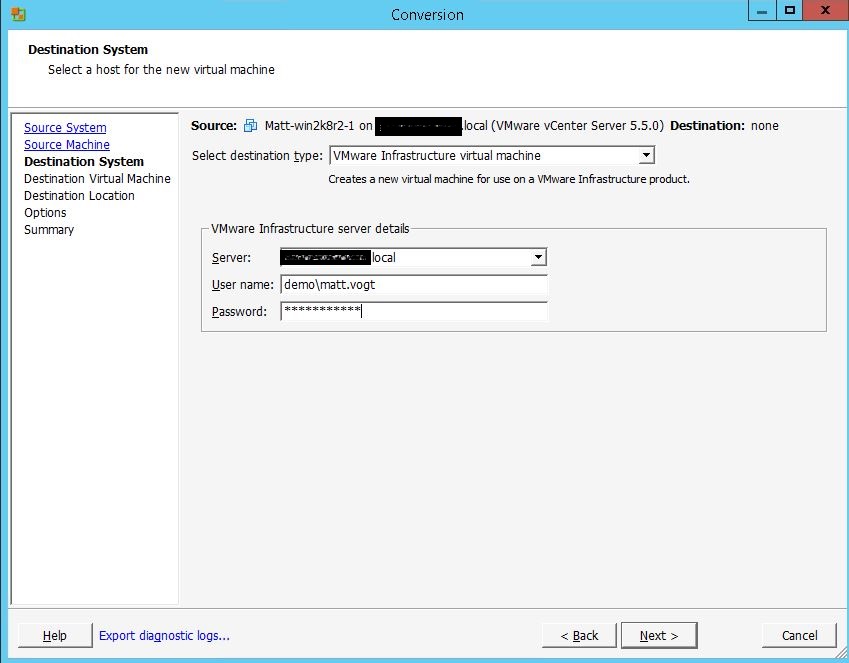
Step 1:
Choose the powered off VM option and choose ‘VMware Infrastructure virtual machine’ from the drop down. Provide your vCenter credentials.

Step 2:
Choose your VM to convert

Step 3:
Choose the destination virtual infrastructure
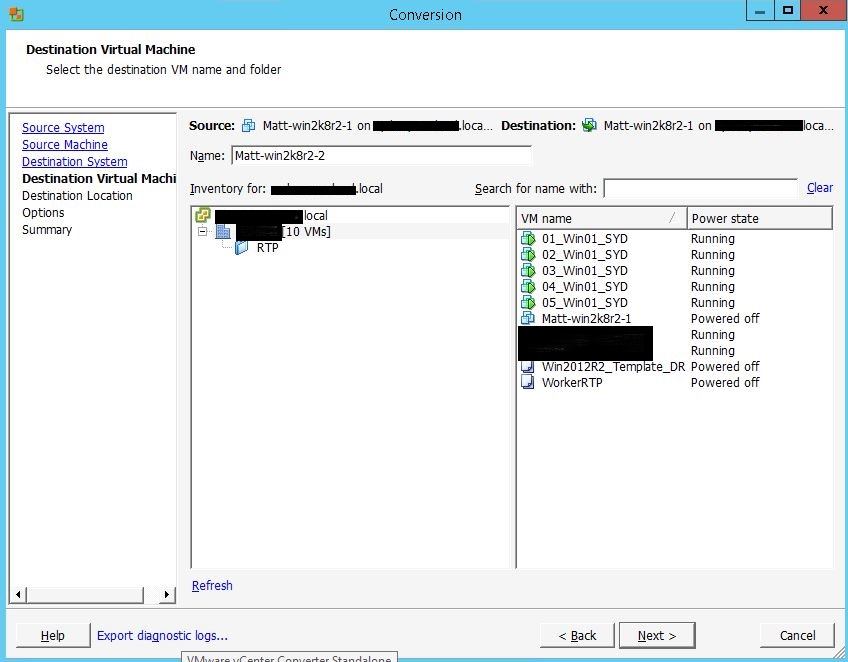
Step 4:
Name your VM (something unique, obviously)
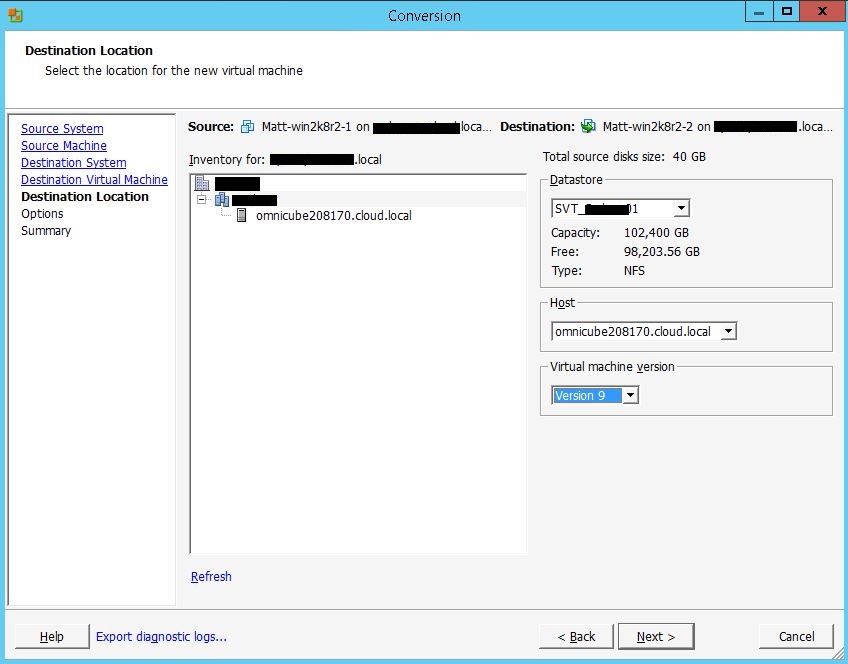
Step 5:
Choose specific destination information: Cluster/Host/Datastore/VM Hardware Version
Step 6:
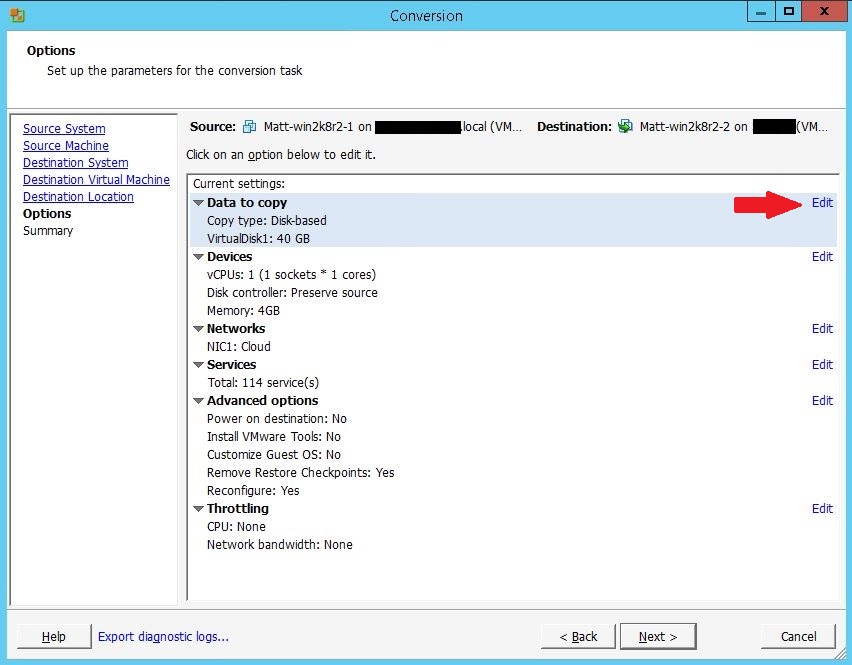
Options Section: Click Edit Settings next to “Data to copy”
Step 7:
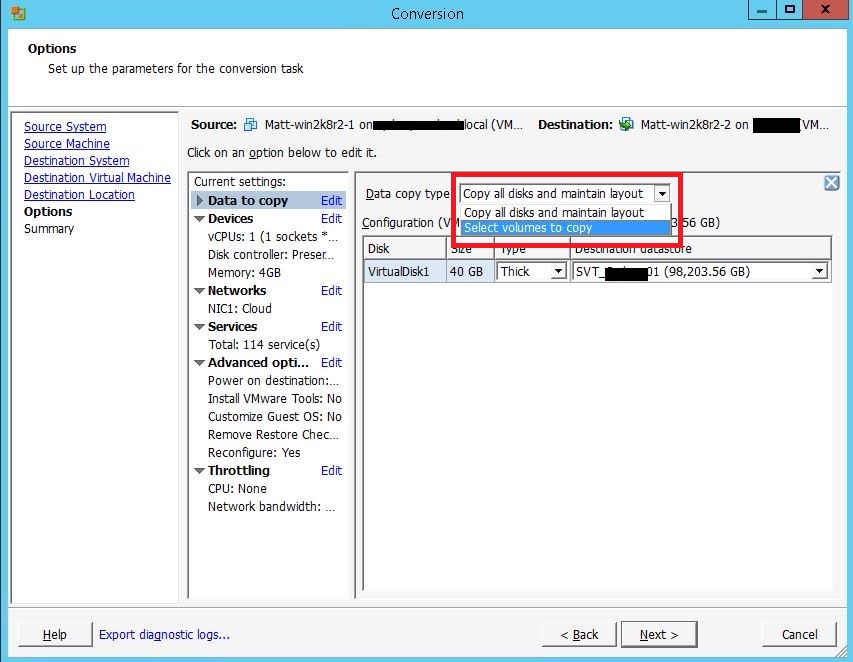
Choose select volumes to copy in the “Data copy type” drop down
Step 8:
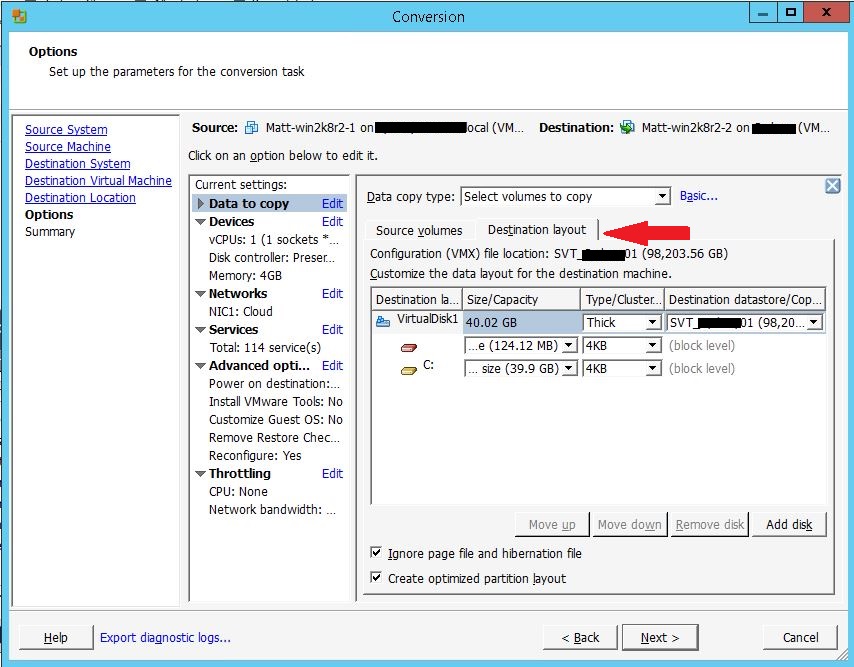
Click Advanced

Step 9:
Click the Destination Layout tab
Step 10:
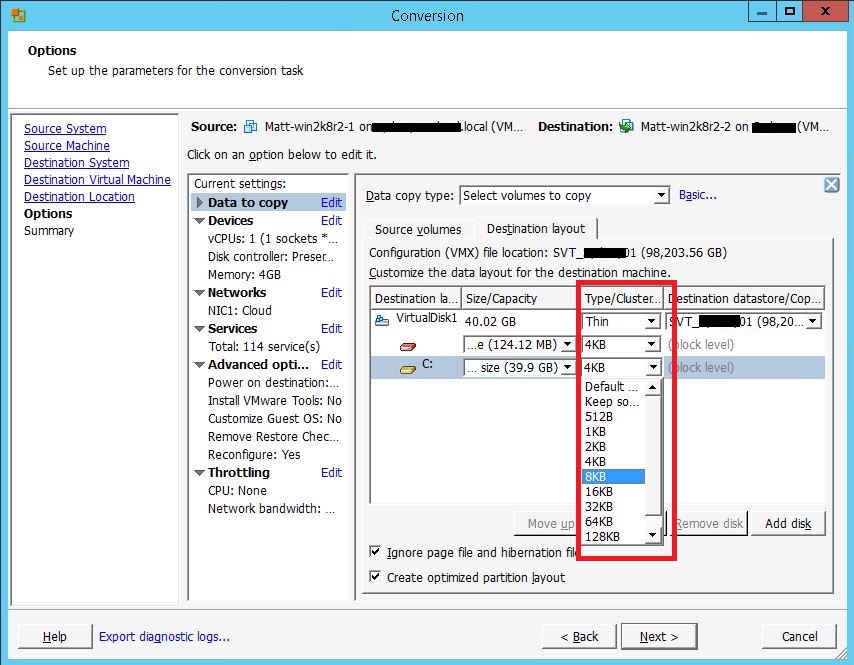
Choose Thick from the “Type/Cluster” drop down on the VirtualDisk1 line, even if the original disk was Thin

Step 11:
Choose 8k from the “Type/Cluster Size” drop down on the boot volume
Step 12:
Click Edit on the “Network” section of the Current Settings pane and choose the correct destination network
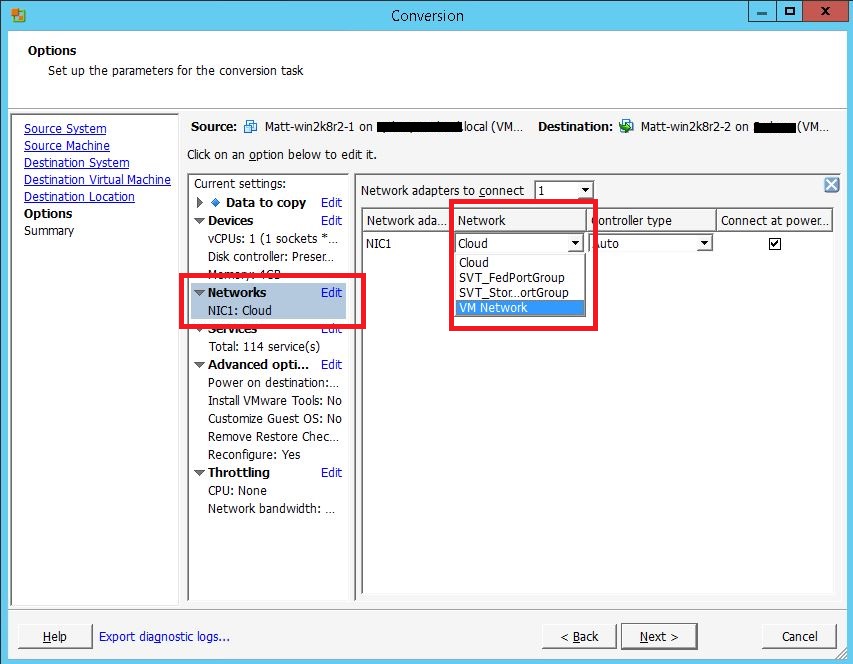
Step 13:
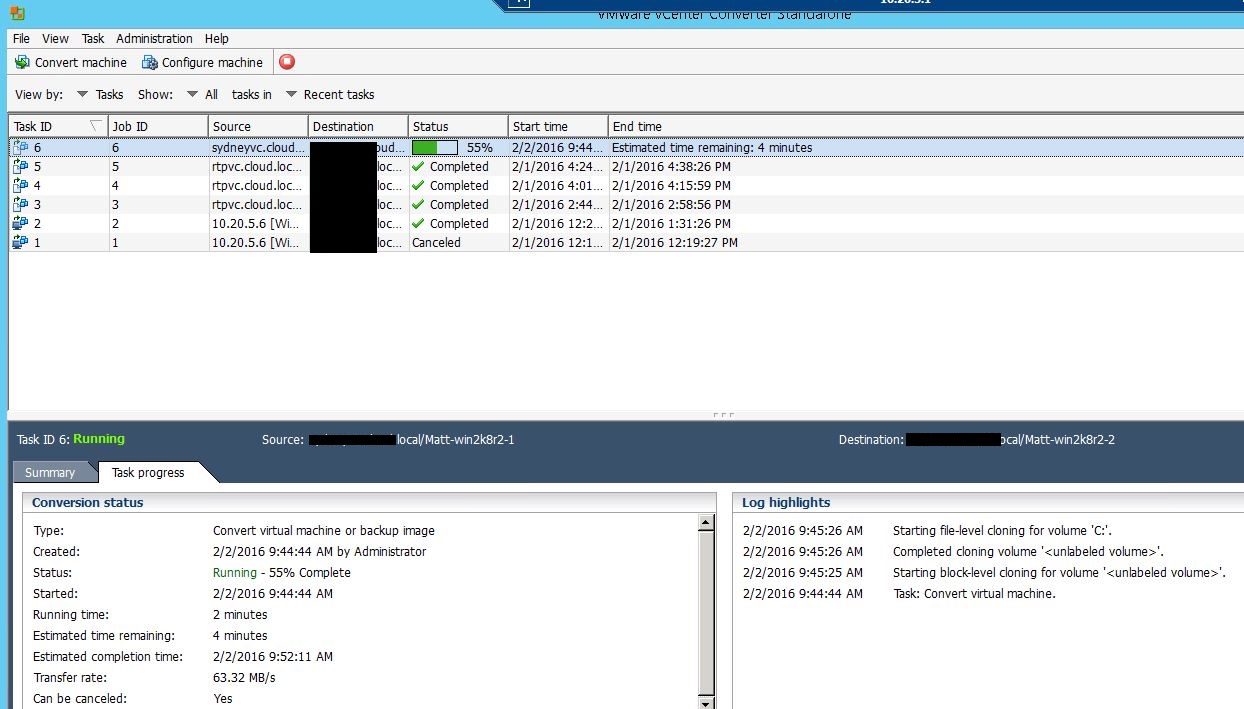
Click Next and monitor progress
Boot the VM and check the new cluster size of the boot volume.
Enjoy your new file system optimized OS (and never install program data to the boot drive again).
Since I work with you can I officially steal your screen shots..
this is nice Doc. can this be scripted